 Bron: hamblog.co.uk
The Raspberry Pi has proved to be a phenomenal hit with hobbyists around the world. Originally conceived to get children into computer programming, it was quickly adopted by hobbyists due to its cheap price and GPIO output pins. Indeed, initial demand was unprecedented and supplies were limited for some time after launch and this still continues after each new version is released.
It didn’t take long for the Amateur Radio community to see the potential in this little computer and sure enough we’re starting to see some really interesting uses coming to the fore.
The purpose of this article is to show you what can already be achieved and give you some ideas, rather than detail how to achieve each use! I’ve provided links against each use to help you take the next steps. Hopefully this article will encourage you to get started with the Pi.
This article is based around a presentation I gave to my local club (CDARS – Chesham & District Amateur Radio Society). You can download a PDF of the presentation here.
Introduction
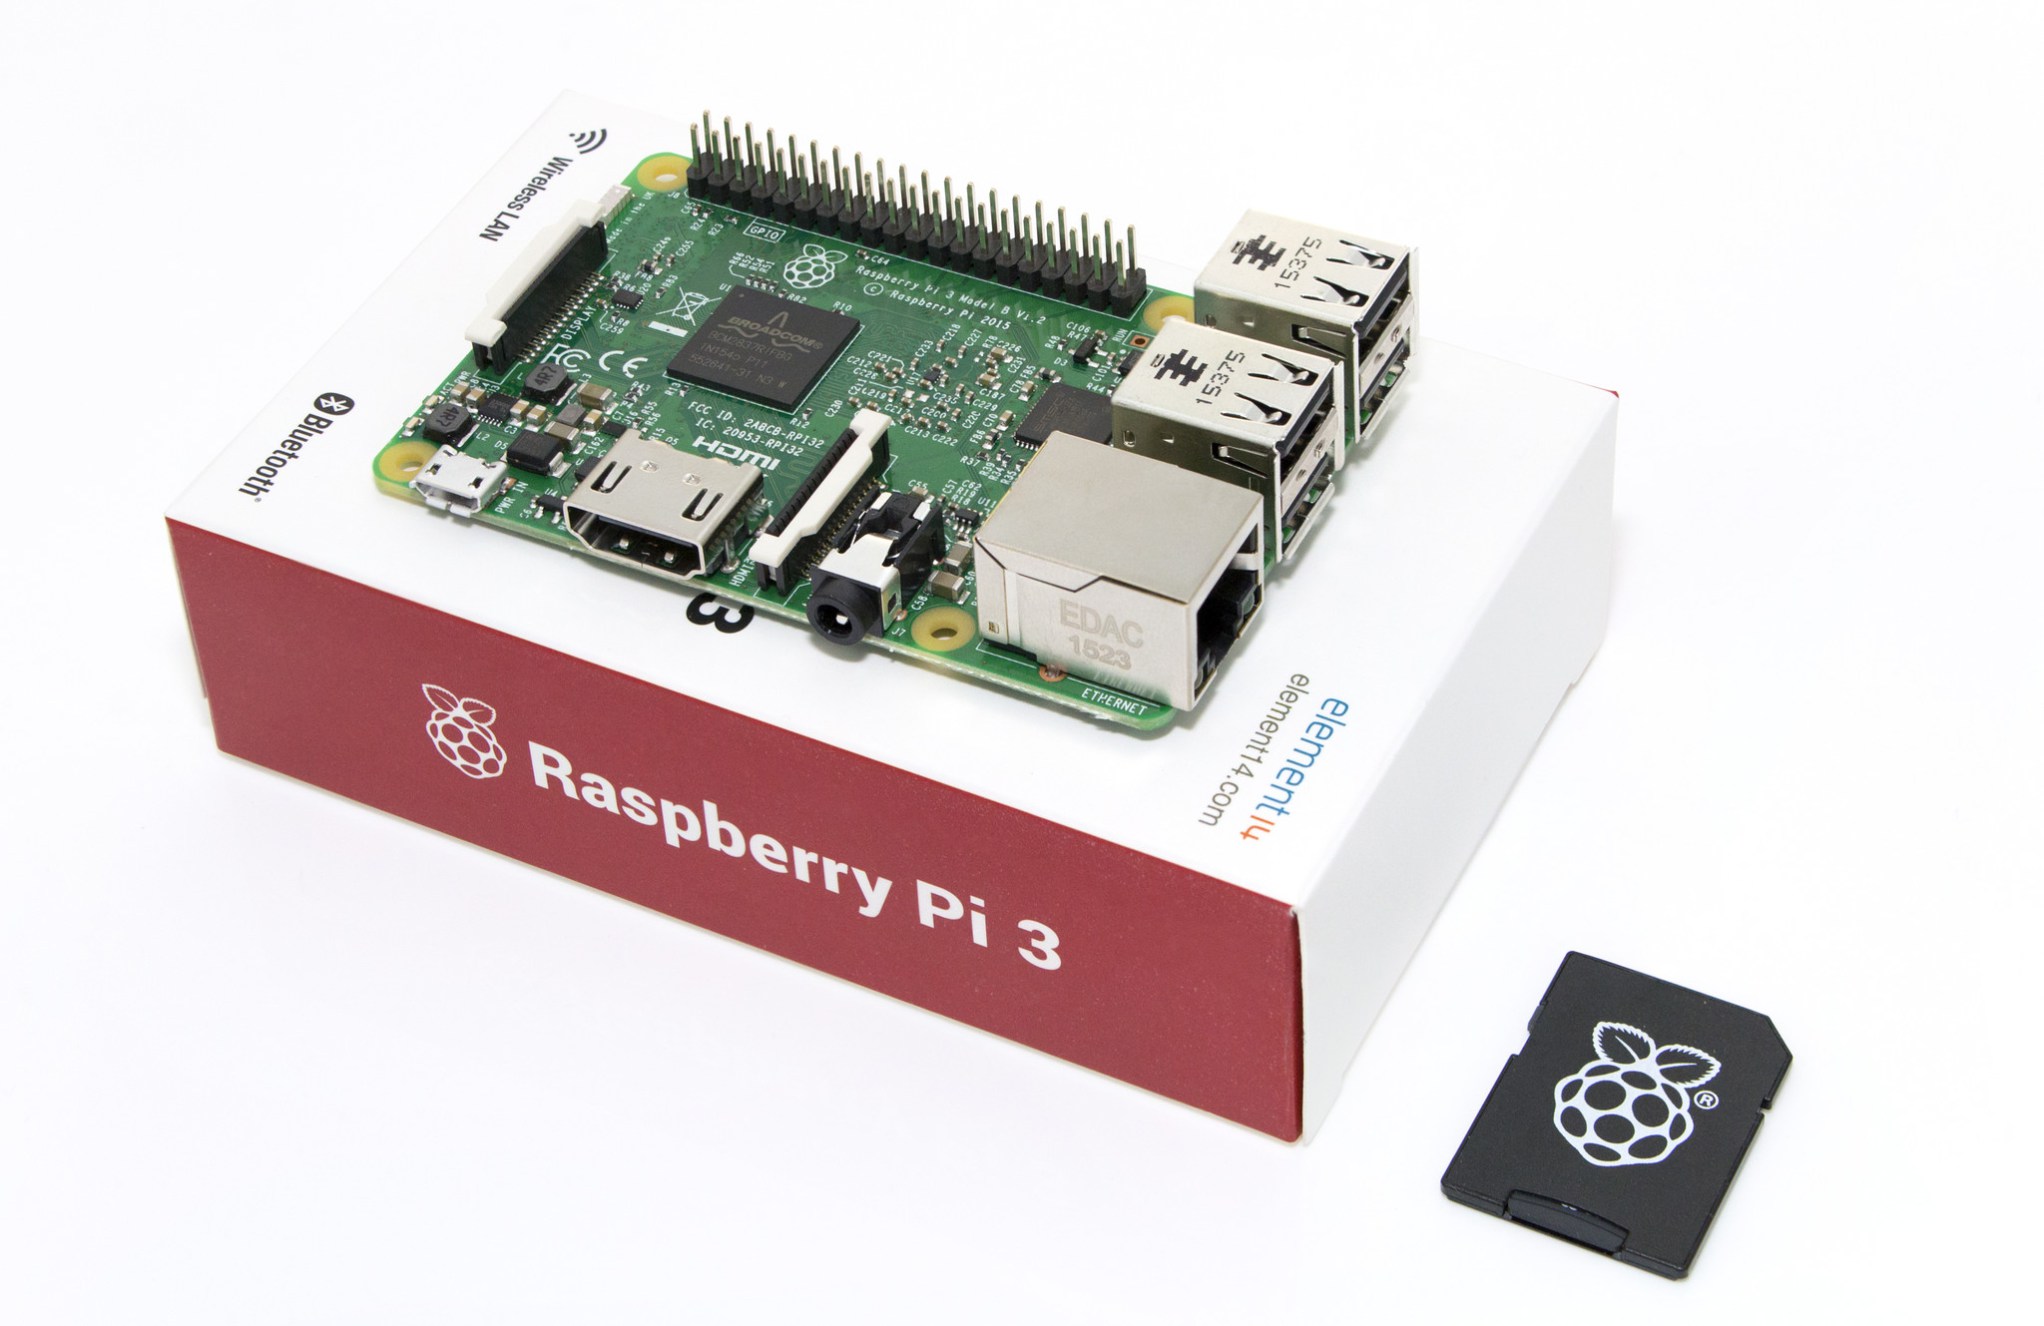
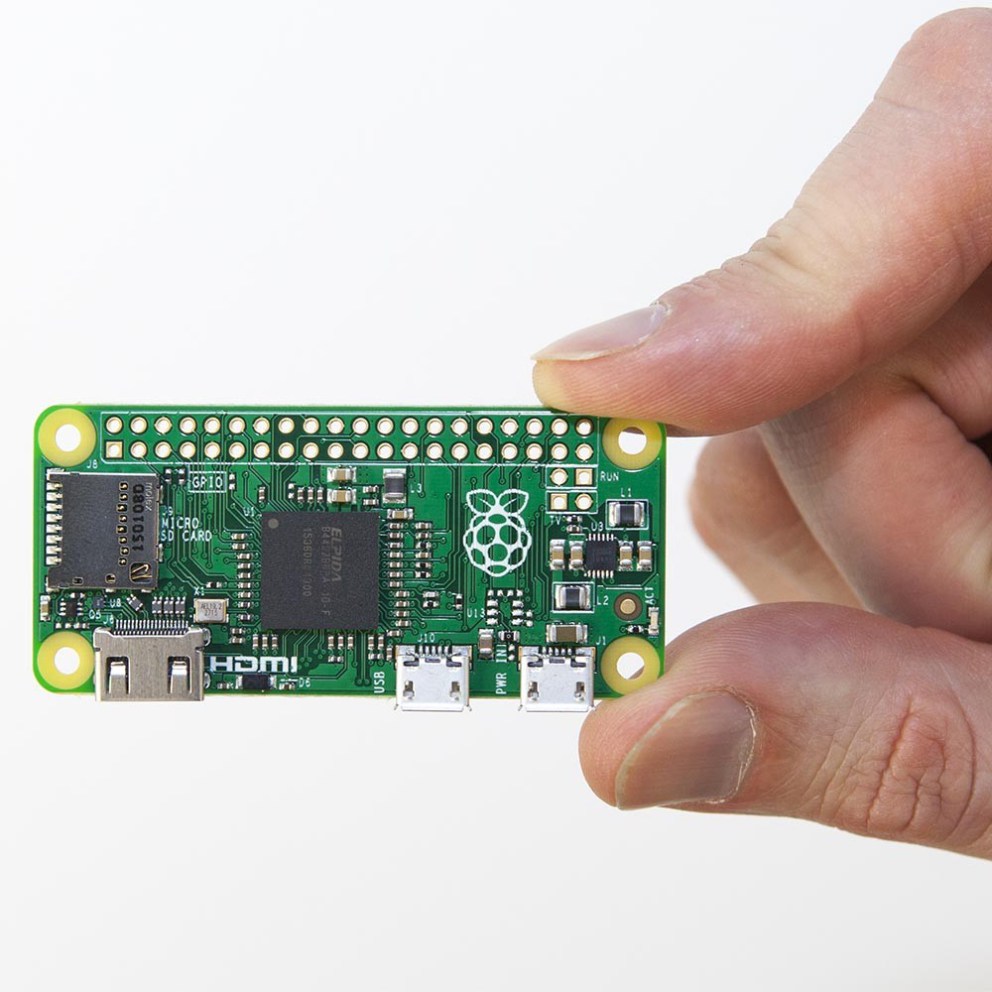 The Raspberry Pi (in its various forms) is a credit card sized computer which costs very little, from £4 for the Raspberry Pi Zero (buy) to £30 for the top-spec Raspberry Pi 3 (buy). This cheap price in part helps makes the Pi a compelling platform for hobbyists looking to experiment with. In fact the Pi Zero is so cheap, it’s almost throw away (but that would be a shame!).
The Raspberry Pi doesn’t use a traditional hard drive, instead it uses SD cards to store the Operating System and software, this is also a very cheap form of storage!
Flavours of Pi
There have been several versions of the Raspberry Pi computer since initial launch, I’ve linked to the most recent versions below:
The Operating System
 First thing you need to know is that the Raspberry Pi doesn’t use Microsoft Windows, this is for several reasons, not least due to cost. Instead it uses the Linux operating system, if you’re not amiliar with this, Linux is Open Source (free), runs 90% of the world’s fastest supercomputers and has a large community of developers and resulting software (all of which is again free).
If you have ever used an Android or Amazon phone or tablet you have already used a ‘distribution’ of Linux, but you probably never realised!
There is a distribution of Linux especially for the Pi called Raspbian and this comes with enough software to get you started.
GPIO Pins
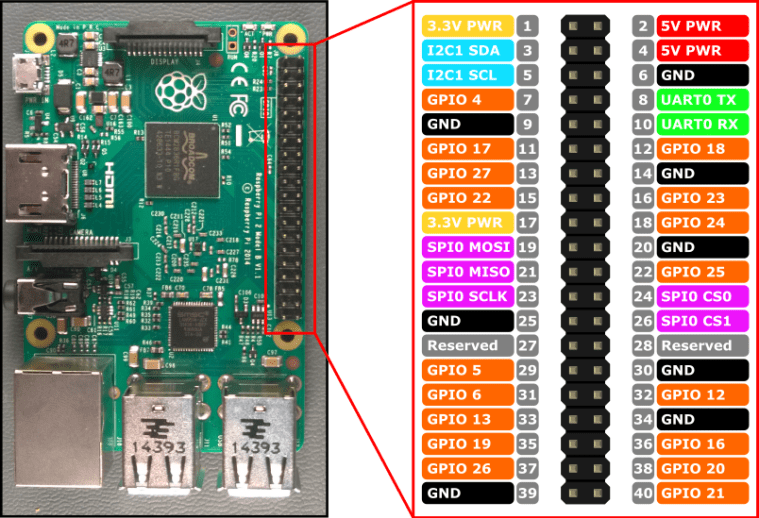 Now we get onto one of the main reasons the Raspberry Pi has been so widely adopted by hobbyists, the General Purpose Input Output Pins (GPIO). Depending on the version of Pi you get they will have anything from 26-40 GPIO pins onboard.
This is what gives us the physical interface between the Pi and the outside world, because it allows us to connect a very wide range of sensors/devices and breakout boards. These devices can collect information and can be controlled by software (which you can install or even write) on the Pi. Suddenly the potential for real world ham radio applications seems endless!
Pi HATs (Hardware Attached on Top) are specially designed bits of hardware which can be purchased and plugged straight into the GPIO pins. These are pre-assembled and are designed to be the same size as the Pi to make mounting easier.
Top 10 Amateur Radio Uses
Now I’ll take a look at my favourite amateur radio uses for the Raspberry Pi, these are listed in order of my priority order.
1. Decoding Data Modes
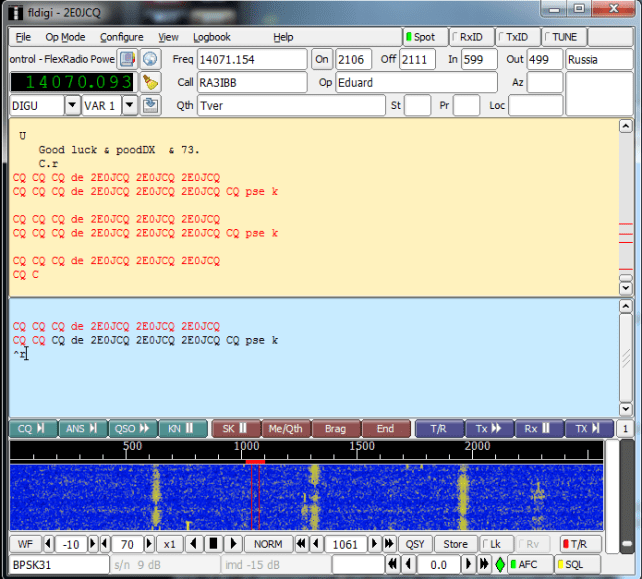 The Raspberry Pi can use the audio input from an external USB sound card to decode digital modes. In fact you can install the popular FLDigi software on the Pi to decode a wide array of data modes including RTTY, PSK and CW to name a few.
This is probably the first project I would recommend to people dipping their toes in the world of Pi, in fact you can even buy SD cards with Raspbian+FLDigi pre-installed from Mike Richards G4WNC. This is a great way to get started quickly.
Once you’re decoding signals on the Pi, you can take it up a notch and start spotting the received signals to the Reverse Beacon Network via the Internet. This is easily done within the FLDigi configuration.
People are experimenting with the Pi and rig control to allow for TX as well, although this is not something I have experience of just yet.
2. Remote Software Defined Radio (SDR)
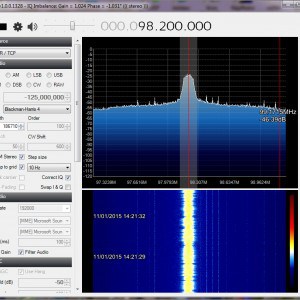 That’s right, you can set-up (probably) the cheapest SDR receiver using a Raspberry Pi, USB soundcard and a RTL Dongle (~£10). You can receive between 25MHz up to around 1800MHz using this dongle, not too shabby. Attach this to a discone antenna and you’ve got a very capable scanner!
You can run the popular SDR# (pronounced SDR Sharp) software under Raspbian to make this a reality.
What’s more, is that the Pi and dongle can be remotely located and accessed from the comfort of your desktop/laptop/tablet device in your home. You of course need to connect your Pi to your home network somehow, you have two choices here either using a WiFi (separate dongle needed) or via Ethernet cable. I would recommend the hardwired cable route if possible to minimise drop outs.
Once again Mike G4WNV sells pre-built SD Cards with everything you need to get started, just add a Raspberry Pi and an RTL dongle (who doesn’t have one knocking around the shack?).
3. WSPR Transmitter
 The Pi is quite incredible in that you can press the GPIO pins into outputting RF between 0-250MHz. Suddenly we have a capable LF/MF/HF/VHF WSPR transmitter! The Raspberry Pi has a reference crystal on board which allows for this, although it will need to be calibrated within the WsprryPi software to ensure it’s precise enough for WSPR.
The Pi provides around 10mW of output, so not a massive amount of RF, but enough for the WSPR beaconing mode. One important note is that it outputs a square wave which necessitates a low pass filter. You will also want to use a regulated power supply with it to ensure additional frequency stability.
A WSPR beacon for an outlay of £4 (assuming Pi Zero)? Amazing!
4. Amateur Satellite Tracking
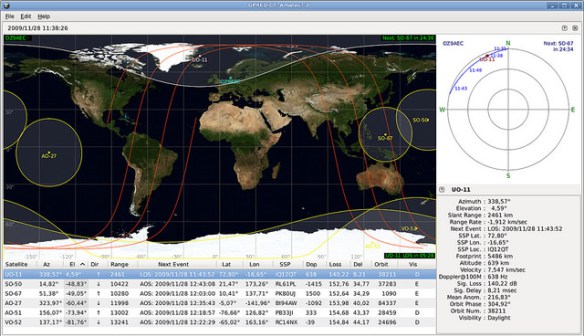 This is probably the easiest Raspberry Pi project you can undertake. Install the GPredict software on your Raspberry Pi and you have a very capable satellite tracker, allowing you to track every conceivable satellite across the world in real time.
It allows you to filter the type of satellites you can track, this is where you can just select the amateur radio satellites you’re interested in working and see in real time which of the birds you can work through.
Of course the next step is to interface the Raspberry Pi with your antenna controller and start tracking the sats in real time, now there’s a thought!
5. Digital Voice (DV) Hotspot
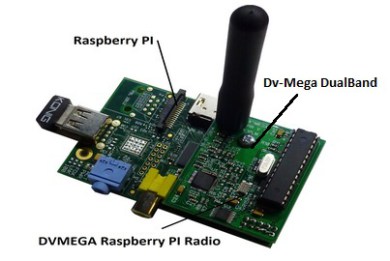 Turning the Pi into a DV (Digital Voice) hotspot has proved to be another popular use of the Pi by amateurs. There are a number of dongles and add on boards which allows you to turn your Pi into an access point into the D-STAR, Fusion and DMR networks.
The Pi bridges the gap from RF to the internet, without you requiring any local repeaters that support DV to be in range.
There are currently two commercial add-ons that will add DV support to your Pi:
This is a great use for a cheap Pi computer, now you can join the digital voice revolution without waiting for your local repeater technology to catch up!
I’ve not tried this yet, but hope to set one up soon so I can make use of my rigs D-Star and Fusion capabilities.
6. APRS I-Gate
You can turn the Raspberry Pi into a APRS (Automatic Packet Reporting System) Digipeater to track the positions of amateurs and indeed yourself. When you connect a HT to you Pi you can receive packets from the radio and send them onto the APRS-IS (internet based APRS network) and vice versa.
Good instructions for setting up a RX only APRS I-Gate can be found here.
7. ADS-B Flight Tracker
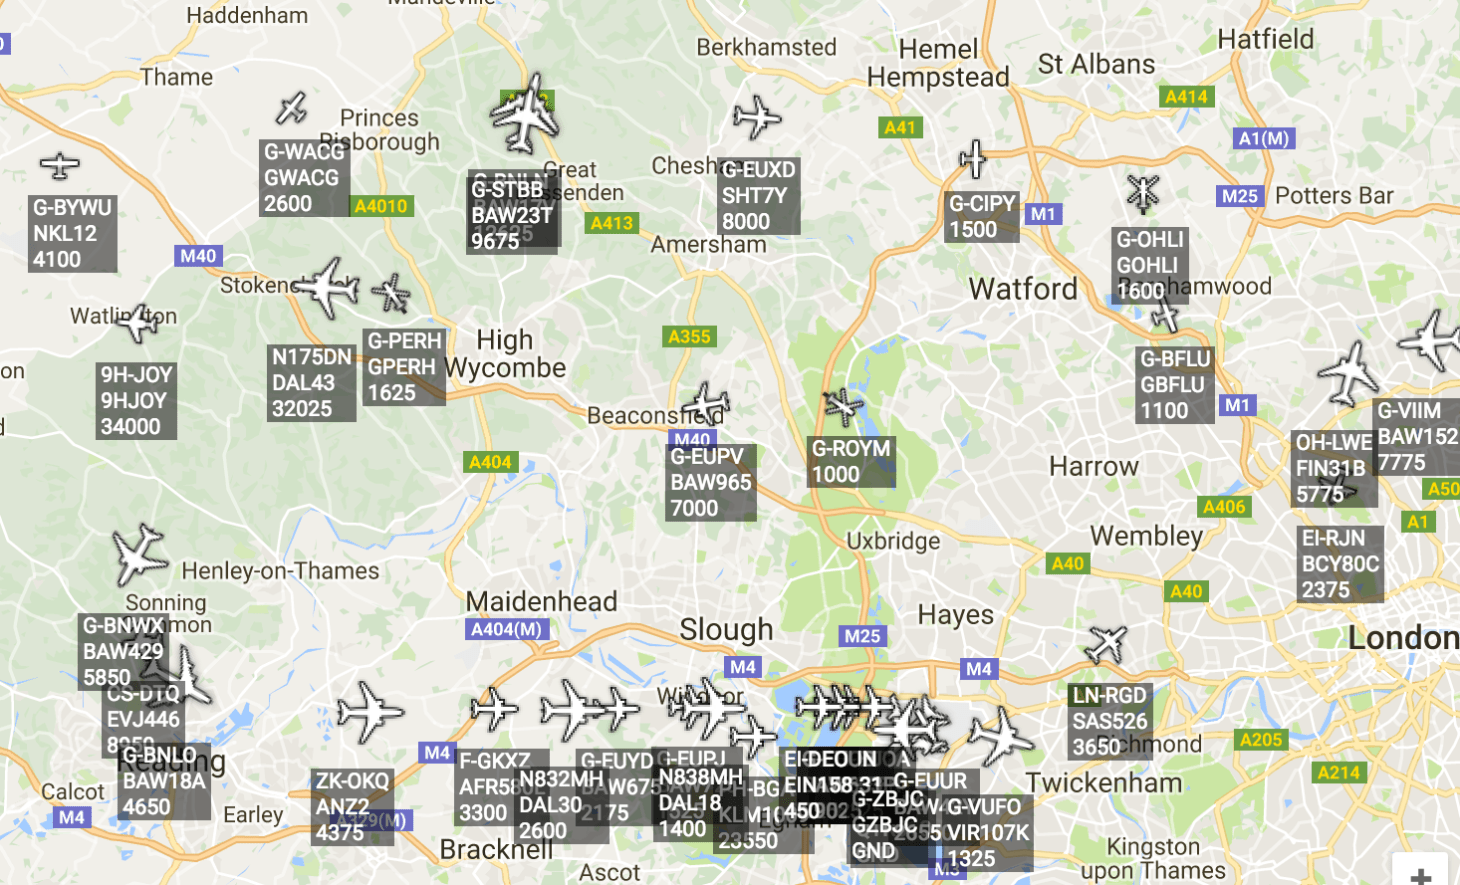
Using the PiAware software you can now track real time ADS-B (Automatic Dependent Surveillance – Broadcast) flight tracking information from aircraft.
This allows you to track the aircraft in your area and track their progress in real time, pretty cool! I live not too far away from London Heathrow airport so there’s always a lot of planes to track, which you can see in the screenshot here.
You will require an SDR dongle (cheap £10 RTL TV dongle will do) to receive these and a suitable antenna for the 1090 MHz signals.
See the PiAware setup instructions or for a more convenient option see Mike G4WNC pre-built SD cards.
8. Rotator Controller
This is not one I’ve tried, but some intrepid experimenters are using the Raspberry Pi to control their antenna rotators. Check out the PiRotator project.
9. Retro Gaming Machine
 Ok, the last two aren’t amateur uses for the Raspberry Pi, but they do rank as many people’s favourite uses for this great little computer!
The Pi can be easily turned into a retro arcade machine to play all of the classic games from your youth.
The RetroPie project gives you everything you need to run games from a whole host of different gaming platforms. I’ve tested ZX Spectrum and SNES games and these run very well!
The Picade (£180) gives your Raspberry Pi a quality arcade cabinet complete with retro controls, this is super cool, but I can’t quite make the jump to spend £180 on it.
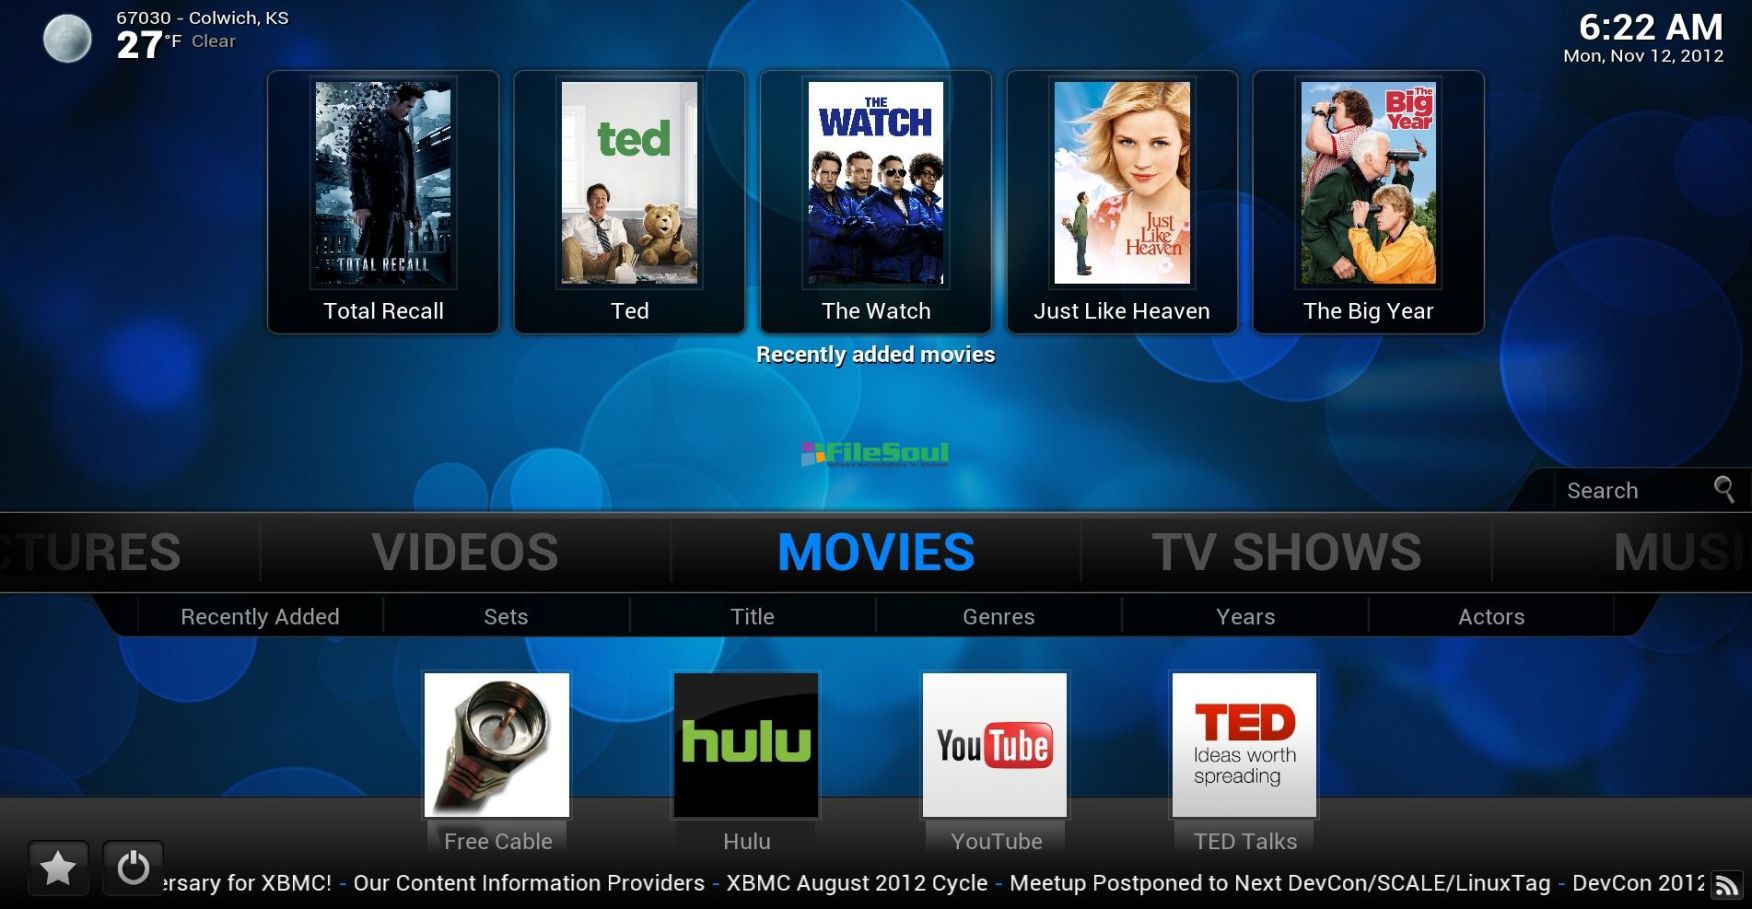
10. Media Centre
You can turn the Pi into a complete media centre, capable of playing a dizzying array of video file types stored locally on a hard drive and even allows you to stream video using popular services such as YouTube, Netflix and Amazon Prime Video. Of course as the Pi has an HDMI output you can connect this straight to your TV.
The software is known as Kodi (previously XBMC) and can run a myriad of add on applications to add a ton of functionality. I’ve used various incarnations of this software for about 10 years now (on other non-Pi platforms) and found it very good.
The Future of Experimentation?
I believe that we’re now in the transition period in amateur radio, moving from the traditional home brewing and into the future of computer/RF augmentation. The Hybridisation of these technologies allows for a lot of interesting new areas in our hobby, we’re already seeing this in the rise of SDR radio.
The Raspberry Pi and Arduino revolution are leading the way at the moment and the limits are only your imagination in what can be done.
This new part of our hobby has a lot of scope for bringing in more of the Maker community into our hobby and will inject new ideas and passion, that is much needed.
Conclusion
Hopefully this article has given you a taster of some of the amateur radio uses of the Raspberry Pi and given you some motivation to get one and give some of these a go. It’s a very versatile computer and for an outlay of £4 you can’t really say no!
The Pi Zero is particularly interesting and I’m sure we will see more from this extremely cheap and small computer in the future. Keep your eyes peeled!
Have you found additional amateur radio uses for the Raspberry Pi? Let me know in the comments.


